How to Use WordPress
- Logging in
- Setting up your ePortfolio
- Editing existing content
- Adding content
- Updating your navigation
Logging in to your ePortfolio
Your ePortfolio URL is https://eportfolio.siue.edu/firstname-lastname, and your log-in link is https://eportfolio.siue.edu/firstname-lastname/wp-admin/. You can always use the ePortfolio Directory to find your site. Log in using your e-ID and your SIUE password to access your Dashboard, where you can make changes and add content to your site.
Setting up your ePortfolio
Your ePortfolio comes with templates for the required pages you’ll need in your first semester:
In your syllabi, you’ll find deadlines for when you should add content to those required pages, usually in the first few weeks of the semester.
Beyond those required pages, though, feel free to make your ePortfolio your own! You can add other pages for your hobbies, extra-curriculars, work experience, or whatever else you want to document.
Customize your site’s appearance
In your dashboard, go to Appearance in the left-hand menu and select Customize. Here you’ll find an array of options to make the site look and feel more like you. Click around in here and see what things you can tweak. (There’s nothing you can break that can’t be fixed, so don’t be afraid to just try things.)
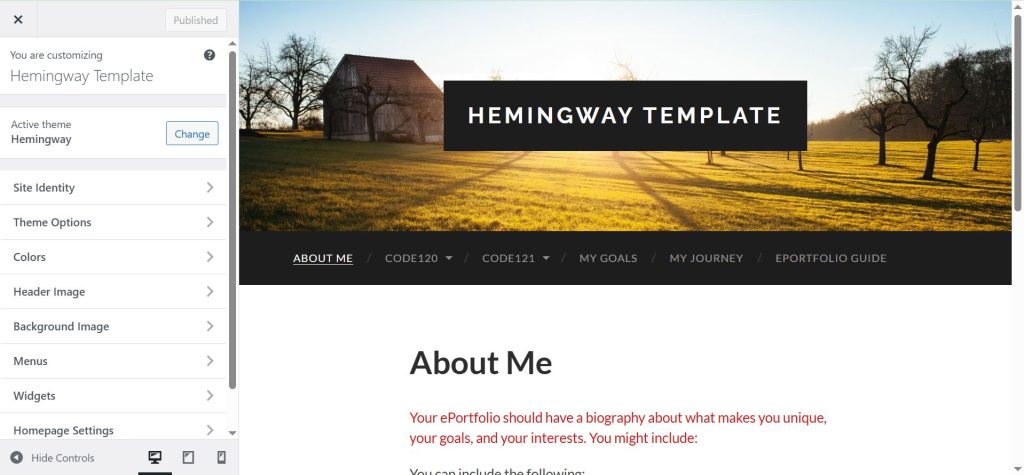
Perhaps the biggest and quickest change you can make is to switch out the Header Image. Choose an image that represents you, your interests, or your aesthetic.
Editing existing content
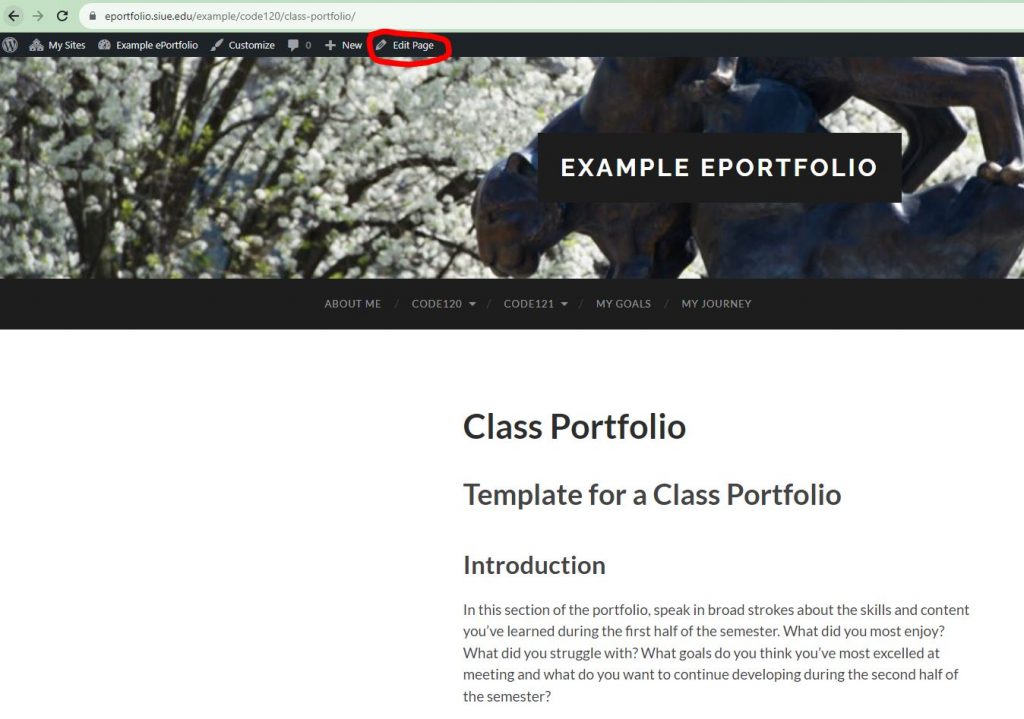
Once you’re logged in, you can edit a page in either of two ways:
1. If you’re on the page you want to edit, you can click on the Edit Page button at the top. (If you don’t see that black ribbon, go ahead and log in or refresh the page.)
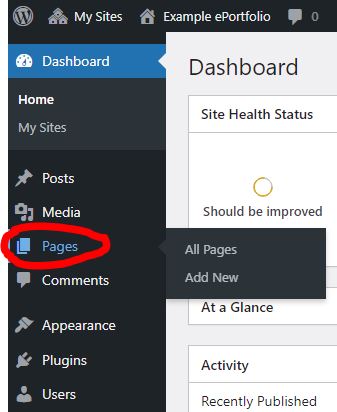
2. You can also edit pages from your dashboard, which you can access by clicking on your site title in the ribbon. (It has the little speed dial next to it.) Once your in your dashboard, you can click Pages in the left-hand menu to access all your pages. Click on a page title to edit.
Adding content
You can put content on your portfolio using Posts and/or Pages. While they look similar, there are a few key differences.
- Posts are usually displayed chronologically on your blog page, and they usually display the author and date. That makes them feel very specific to the moment you write them. They might be a good choice if you’re doing frequent updates on an ongoing project, reflecting on your progress, or reporting on work you’re doing in class.
- Pages are more static. They don’t display an author or date, and you access them through your site menu. Pages are a good choice for broad overviews, reflecting on something you’ve already completed, or general content.
You can add pages and posts either by clicking on the + in the top ribbon or by choosing Add New in the appropriate section of the dashboard.
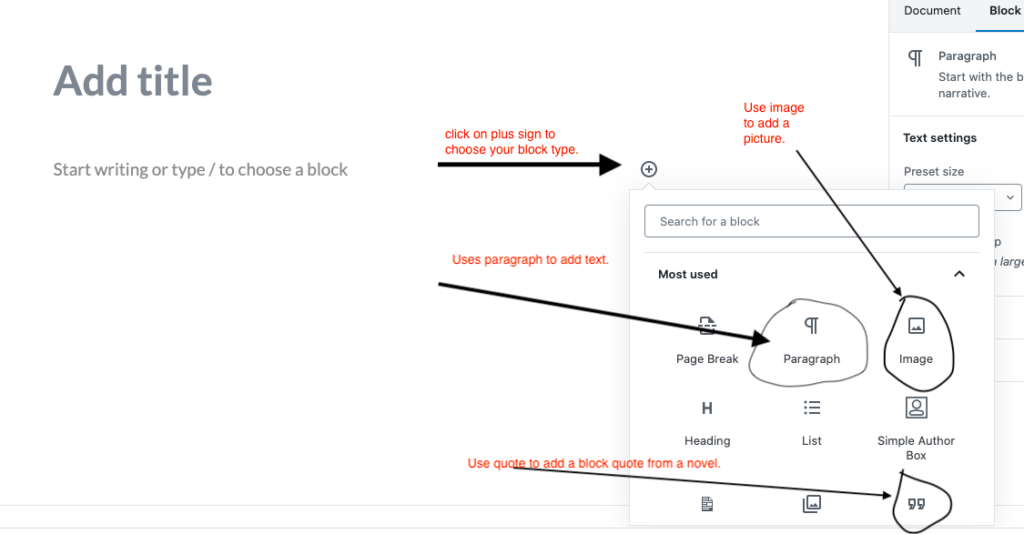
Blocks are the basic pieces you use to build your post or page. There’s a block for just about any kind of content you might want to add – a heading, a paragraph, an image, social media embeds, etc.
Adding a Block with Text or Media: Click on the plus sign to choose what kind of content block you are adding. Common blocks include “paragraph” to add text, “image” to add a picture, or “quotation” to add a block quote.
- Adding your text: Add a paragraph block and then type your text. Note that a toolbar will pop up at the top of the screen giving you options for formatting the text.
- Adding images: Add an “Image” block. The site will give you the option to add an image from a URL, upload one from your computer, or choose one that has already been added to the media library.
- Adding YouTube videos: When you add a block, under the “embed menu,” choose YouTube video. Add YouTube’s share link to the box.
- Block quoting: If you have a line that is four lines or longer you should turn it into an indented block quote. To do so, after you introduce your quote, add a “quote” block.
- Saving your work: Click on “Save Draft” and then “Preview” in the widget in the upper-right hand corner to check your work. Take your time, add to the post, and proofread.
- Publishing: Choose “Publish” from the widget at the right for the post to appear on your blog (or at the left of the editor in the “improved” version). If the page has been published before, that button will say “Update” instead.

Updating your navigation
Every semester, you’ll add new portfolio pages to your ePortfolio for each of your CODES classes. While those are built in for you in your first semester, you’ll add those yourself in subsequent semesters. That means you’ll also need to update your navigation.
There are two ways you can get to your menu, both under the Appearance tab in your Dashboard:
- You can go straight to the Menus tab, or
- You can go into your Customize pane and go to the Menus tab.
For this tutorial, we’ll use Appearance > Menus.
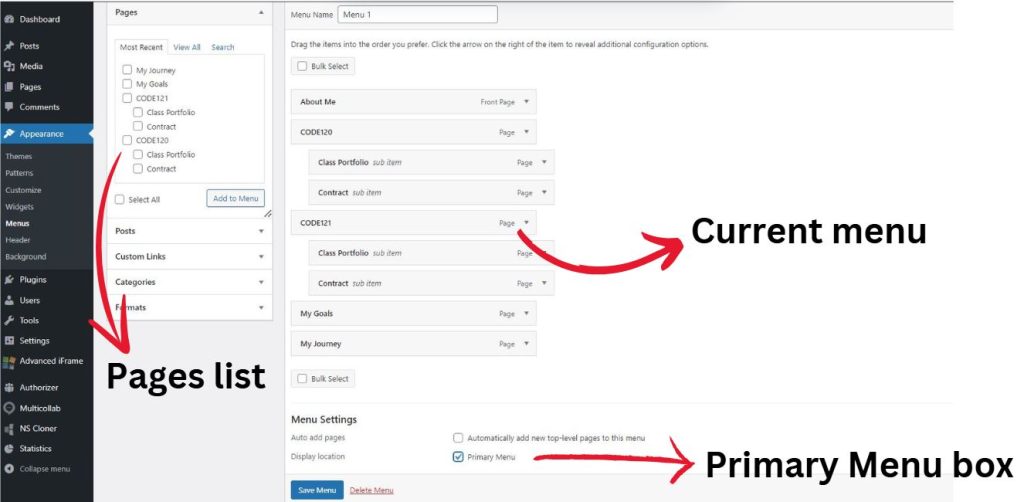
This screen shows you your current menu. The pages that are indented are sub-items, meaning that they’ll show up in a drop-down menu when you hover over the main item.
To add items to your menu, check the box in the Pages list to the left of the menu, and click the Add to Menu button. If you don’t see the page you’re looking for, click the View All tab at the top of the list.
If you want to add a blog post or other content besides a page, click on the tabs below the Pages list to expand them.
When you’ve got your items added to the menu, drag and drop them into the order you want them to appear. To create sub-items, drag the item to the right below the item you want it nested under.
Before you leave the page, make sure you check the Primary Menu box and click Save Menu.